Tutorials#
These tutorials show how to use the Config Manager Agent Microservice.
Tutorial 1: Make changes to the microservice configuration using Etcd web UI#
In this tutorial, you will learn how to access the Etcd web UI and make changes to the microservice configuration.
Time to Complete#
15 minutes.
Learning Objectives#
By the end of this tutorial, you will know how to access the Etcd web UI and make changes to the microservice configuration.
Prerequisites#
Ensure that
docker psis clean anddocker network lsdoes not have Intel® Edge Insights System bridge network.
Step 1: Deploying the Intel® Edge Insights System Stack#
Run the following command from the [work_dir]/IEdgeInsights/build directory deploy the Intel® Edge Insights System Stack:
   python3.10 builder.py -f usecases/<usecase>.yml
   # Launch the services
   ./run.sh -v -s
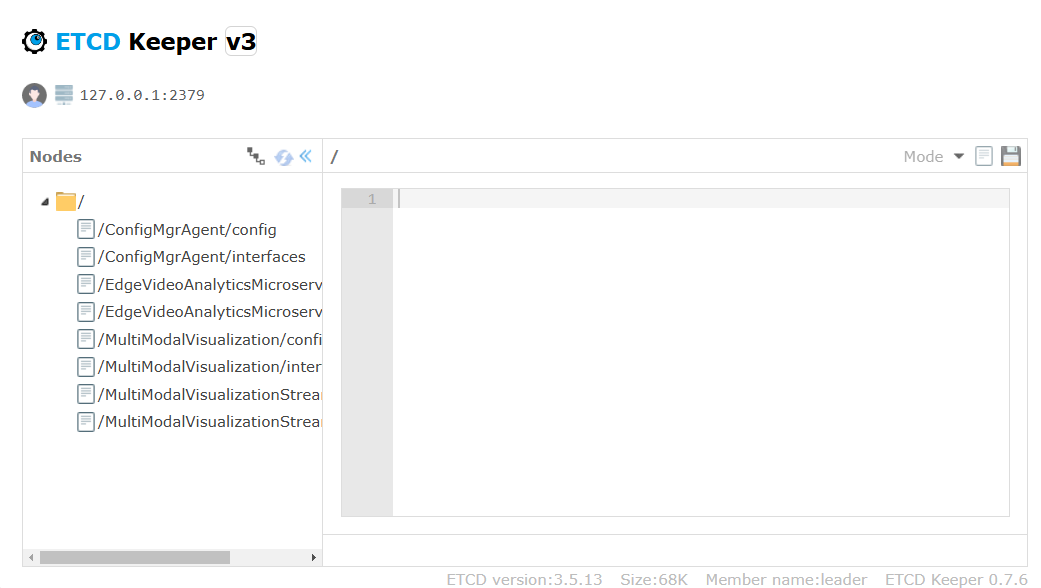
Step 2: Accessing the Etcd web UI#
The Etcd web UI can be accessed with the following steps.
Open the browser and enter the address:
https://$(HOST_IP):7071/etcdkeeper/. In this case, CA cert has to be imported in the browser.Click on the version of the title to select the version of etcd. By default, the version is V3. Reopening will remember user’s choice.
Right-click on the tree node to add or delete.
For secure mode, authentication is required. User name and password needs to be entered in the dialogue box.
Username is the ‘root’ and default password is located at
ETCDROOT_PASSWORDkey present in the .env file at location[work_dir]/IEdgeInsights/build/.envThis service is accessed from a remote system at address:
https://$(HOST_IP):7071.
Step 3: To Add Self Signed Certificate as Trusted in local Browser#
Follow the below steps to Add Self Signed Certificate as Trusted in local Browser.
Go to the
builddirectory of the repo
cd <workdir>/IEdgeInsights/build/Certificates/ConfigMgrAgent/
Download Root CA Cert from the EtcdUI

Import the RootCA certificates as Trusted Root Certificate in browser
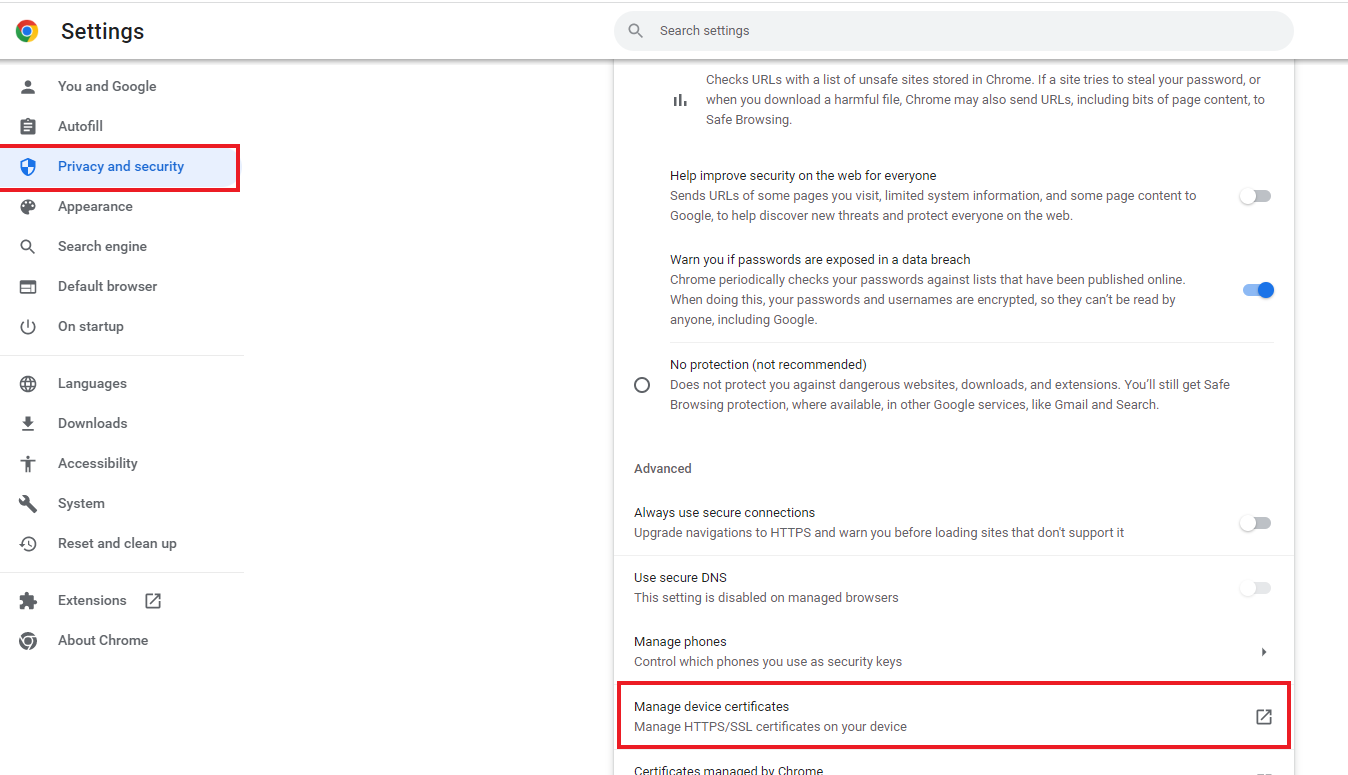
For Chrome Browser, Follow the below steps
i. Open Chrome settings, scroll to the bottom, and click Privacy and security
ii. Click Manage devices certificates…
iii. Click the Trusted Root Certification Authorities tab, then click the Import… button. This opens the Certificate Import Wizard. Click Next to get to the File to Import screen.
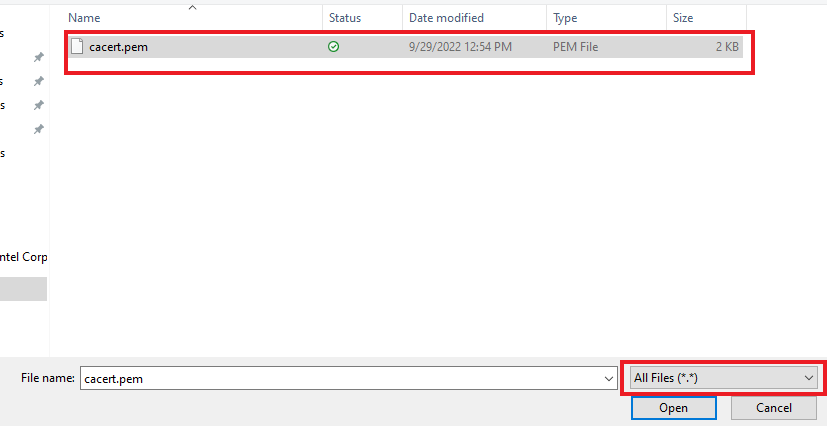
iv. Click Browse… and under File Type select All Files and select the certificate file you saved earlier, then click Next.
v. Select Place all certificates in the following store. The selected store should be Trusted Root Certification Authorities. If it isn’t, click Browse… and select it. Click Next and Finish
vi. Click Yes on the security warning.
vii. Restart Chrome.
Step 4: Making changes to the microservice configuration#
The ETCD watch capability is enabled for all microservices. It will auto-restart microservices when microservices config/interface changes are done via the EtcdUI interface. Any changes done to these keys are reflected at runtime in Intel® Edge Insights System.
Follow the below steps to make changes to the microservice configuration.
Login to the Etcd web UI.
Click to view the configuration of the microservice.
Make changes to the configuration and click on save option as shown below.

You will see that the microservice has restarted using the updated configuration. You can verify this by checking the logs of that microservice
docker logs -f <service>.
Optional: For capturing the data back from Etcd to a JSON file, run the etcd_capture.sh script. This can be achieved using the following command:
docker exec -it ia_configmgr_agent ./scripts/etcd_capture.sh
Summary#
In this tutorial, you learned how to access and make changes to microservice configurations using Etcd web UI.