Get Started#
Loitering Detection leverages advanced AI algorithms to monitor and analyze real-time video feeds, identifying individuals lingering in designated areas. It provides a modular architecture that integrates seamlessly with various input sources and leverages AI models to deliver accurate and actionable insights.
By following this guide, you will learn how to:
Set up the sample application: Use Docker Compose to quickly deploy the application in your environment.
Run a predefined pipeline: Execute a pipeline to see loitering detection in action.
Prerequisites#
Verify that your system meets the minimum requirements.
Install Docker: Installation Guide.
Install Python pip and venv packages
sudo apt update && sudo apt install -y python3-pip python3-venv
Set up and First Use#
Download the Compose File:
Download the Docker Compose file and configuration:
git clone https://github.com/intel/metro-ai-suite.git
Navigate to the Directory:
Go to the directory where you saved the Compose file:
cd metro-ai-suite/loitering-detection/
Update the IP Address:
Open the
.envfile:nano .envModify the HOST_IP variable in the .env file to your actual host IP address.
HOST_IP=10.10.10.10
Save and close the file.
Update Dashboard with your Host IP Address and Use Case
./update_dashboard.shDownload the Model and Video files
./install.shStart the Application:
Run the application using Docker Compose:
make start
Verify the Application:
Check all containers are in Running state:
docker ps
Access the Application:
Open a browser and go to
http://localhost:3000to access the Grafana dashboard.Change the localhost to your host IP if you are accessing it remotely.
Log in with the following credentials:
Username:
adminPassword:
admin
Check under the Dashboards section for the default dashboard named “Video Analytics Dashboard”.
Run a Predefined Pipeline:
Run the following commands to start the pipeline
./run_sample.sh
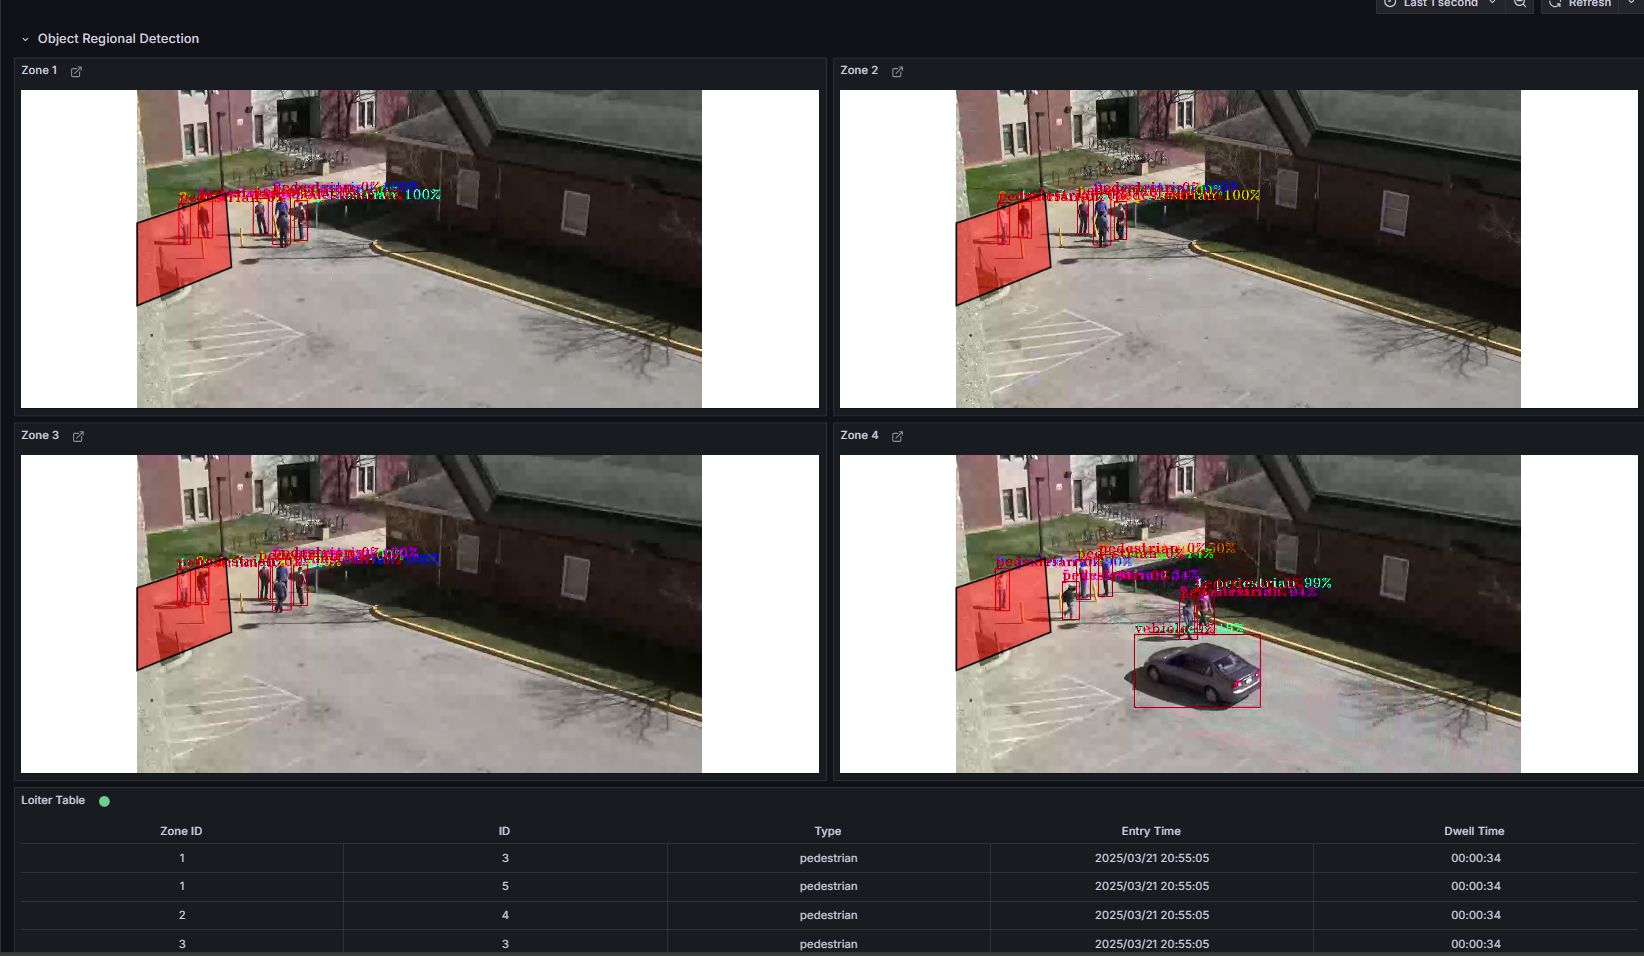
Expected Results:
The dashboard displays detected cars.
Stop the Containers#
To stop the application, use the following commands:
make stop
Next Steps#
Troubleshooting#
Containers Not Starting:
Check the Docker logs for errors:
docker compose logs
No Video Streaming on Grafana Dashboard
Go to the Grafana “Video Analytics Dashboard”.
Click on the Edit option (located on the right side) under the WebRTC Stream panel.
Update the URL from
http://localhost:8083tohttp://host-ip:8083.
Failed Grafana Deployment
If unable to deploy grafana container successfully due to fail to GET “https://grafana.com/api/plugins/yesoreyeram-infinity-datasource/versions”: context deadline exceeded, please ensure the proxy is configured in the ~/.docker/config.json as shown below:
        "proxies": {
                "default": {
                        "httpProxy": "<Enter http proxy>",
                        "httpsProxy": "<Enter https proxy>",
                        "noProxy": "<Enter no proxy>"
                }
        }
After editing the file, remember to reload and restart docker before deploying the microservice again.
systemctl daemon-reload
systemctl restart docker