Get Started Guide#
Time to Complete: 5 - 15 minutes
Programming Language: Python 3
Prerequisites#
Ensure that the following installations are present.
unzip. It can be installed using
sudo apt-get install unzipOS
Python
Ubuntu 22.04
3.10
Install the Microservice#
Download latest package of EVAM from this page. Upon download you would get intel_edge_video_analytics.zip file and a product key to your registered email-ID. Once received, follow the steps below to install it.
Open a new terminal, go to the downloaded folder, and unzip the downloaded package:
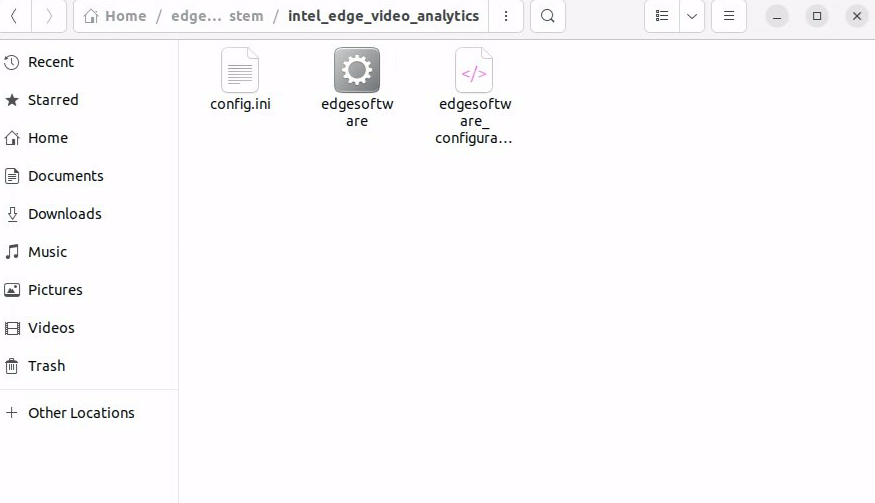
unzip intel_edge_video_analytics.zipAfter extracting the package, you can view the following files:
Go to the intel_edge_video_analytics/ directory:
cd intel_edge_video_analytics
Change permission of the executable edgesoftware file:
chmod 755 edgesoftware
Install the microservice:
./edgesoftware installWhen prompted for the product key, enter the Product Key mentioned in the email you received from Intel confirming your download.
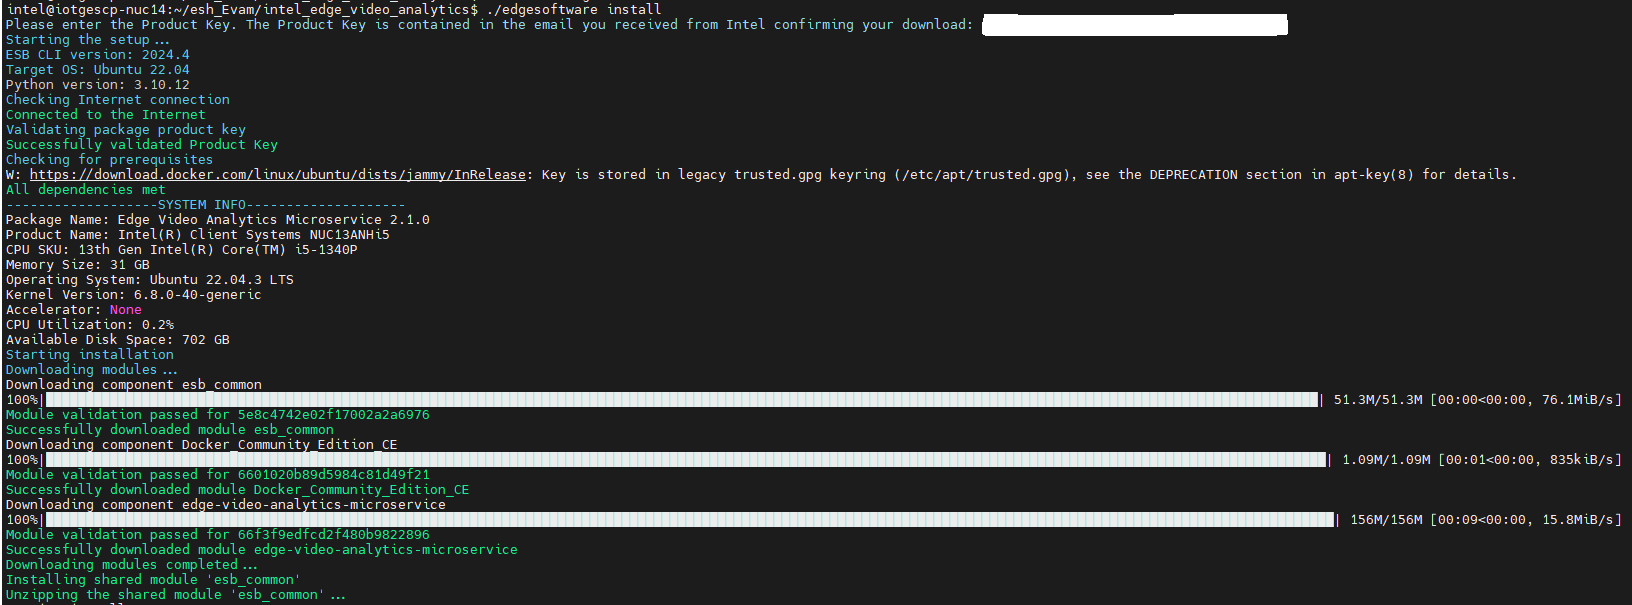
When the installation is complete, check for the Installation of package complete message and the installation status for each module.

Run EVAM in standalone deployment#
In this step, you will run the Edge Video Analytics Microservice (EVAM) in standalone mode.
Start the microservice:
As mentioned below, change directory to root folder of EVAM in the extracted package. This path will be used as [EVAM_WORKDIR] for user instructions in rest of the document. Here version is the selected version during download
cd Edge_Video_Analytics_Microservice_<version>/edge-video-analytics-microservice/
Change directory to
dockerfolder and launch containerscd docker/ docker compose up -d
Send a REST request to run the default Pallet Defect Detection pipeline:
To run the default pipeline (with Pallet Defect Detection GETi model), open another shell terminal and send a request by running below curl command.
The request specifies warehouse.avi as a source file, GETi deployment directory to be used for inference along with other parameters that the UDF takes, intends to publish metadata to a file /tmp/results.jsonl and send frames over RTSP for streaming.
The REST request will return a pipeline instance ID, which can be used to query the status of the pipeline. For the first run, the request will return the pipeline instance id (for example, a6d67224eacc11ec9f360242c0a86003).
RTSP Stream will be accessible at rtsp://<SYSTEM_IP_ADDRESS>:8554/pallet-defect-detection. Users can view this on any media player e.g. vlc, ffplay etc
Use the following sample cURL command
curl http://localhost:8080/pipelines/user_defined_pipelines/pallet_defect_detection -X POST -H 'Content-Type: application/json' -d '{
                "source": {
                    "uri": "file:///home/pipeline-server/resources/videos/warehouse.avi",
                    "type": "uri"
                },
                "destination": {
                "metadata": {
                        "type": "file",
                        "path": "/tmp/results.jsonl",
                        "format": "json-lines"
                    },
                    "frame": {
                        "type": "rtsp",
                        "path": "pallet-defect-detection"
                    }
                },
                "parameters": {
                    "udfloader": {
                        "udfs": [
                            {
                                "name": "python.geti_udf.geti_udf",
                                "type": "python",
                                "device": "CPU",
                                "visualize": "true",
                                "deployment": "./resources/models/geti/pallet_defect_detection/deployment",
                                "metadata_converter": "null"
                            }
                        ]
                    }
                }
}'
Run below commands to,
To view pipeline Status send below command.
curl --location -X GET http://localhost:8080/pipelines/status
To Stop pipeline send below command
curl --location -X DELETE http://localhost:8080/pipelines/{instance_id}
To Stop application i.e EVAM containers.
docker compose down -v
Now you have successfully run the Edge Video Analytics Microservice container, sent a curl request to start a pipeline within the microservice which runs the Geti based Pallet Defect Detection model on a sample warehouse.avi video. Then, you have also looked into the status of the pipeline to see if everything worked as expected and eventually stopped the pipeline as well.
Enable HTTPS#
To enable HTTPS for EVAM, you’ll need to provide the necessary certificate and key.
Execute the
generate_tls_certs_keys.shscript to create the relevant self-signed certificates and keys for the certificate authority (CA) and EVAM’s server.cd [EVAM_WORKDIR]/utils sudo ./generate_tls_certs_keys.sh
Note: When you execute
generate_tls_certs_keys.sh, the[EVAM_WORKDIR]/Certificates/ssl_serverdirectory and certificate files will be created.To learn more about the supported arguments for the
generate_tls_certs_keys.shscript, execute./generate_tls_certs_keys.sh --help.Set the
HTTPSenvironment variable totruein thedocker-compose.ymlfile.version: "3" services: edge_video_analytics_microservice: ... environment: ... - HTTPS=true
Note: When HTTPS is enabled, you will need to use the
-kflag withcurlwhich disables attempts to verify self-signed certificates against a certificate authority.Example
curlcommand to view all pipelines:curl -k --location -X GET https://localhost:8080/pipelines
(Optional) Enable mTLS Verification#
Execute the
generate_tls_certs_keys.shscript to create the relevant self-signed certificates and keys for the CA, EVAM’s server, and a client.cd utils sudo ./generate_tls_certs_keys.sh true [server_ip]
To learn more about the supported arguments for the
generate_tls_certs_keys.shscript, execute./generate_tls_certs_keys.sh --help.Set the
MTLS_VERIFICATIONenvironment variable totruein thedocker-compose.ymlfile.version: "3" services: edge_video_analytics_microservice: ... environment: ... - MTLS_VERIFICATION=true
Note: If
HTTPS=trueandMTLS_VERIFICATION=true, EVAM’s REST API server will verify a client’s certificate in accordance with mTLS. You will need to specify the CA’s certificate, the client’s certificate and key with thecurlcommand.
Example
curlcommand to view all pipelines:curl --cacert ca.crt --key client.key --cert client.crt --location -X GET https://localhost:8080/pipelines
Summary#
In this get started guide, you learned how to download, configure, and run the EVAM in Standalone mode.
Learn More#
Understand the components, services, architecture, and data flow, in the Overview.
For more details on advanced configuration, usage of features refer to Detailed Usage
For more tutorials, refer to Tutorials How-to guide.
For more details on Intel Deep Learning Streamer visit this page.
Known Issues#
Issue: The installation might fail due to a loss in internet connectivity.
Workaround: Connect your system to stable internet connection during the installation.
Issue: The installation may fail while downloading or while pulling the images from the Intel registry due to an unexpected error.
Workaround: Re-run the installation and provide the Product Key:
./edgesoftware install
Issue: The creation of a pipeline instance that uses a model downloaded from the model registry microservice during EVAM’s startup process may fail if the auto_start property is set to true in the config.json. This issue is due to missing files at the path specified via the deployment property.
Workaround:
Monitor the terminal for the “Deployment directory (
{deployment}) created for the{pipeline['name']}pipeline.” log message.Once the message is logged, send a POST request to the
/pipelines/{name}/{version}endpoint with the relevant request body to create a pipeline instance. Note: This workaround is a temporary measure. Our team is actively working on a solution to automatically create a pipeline instance after successfully downloading the model files.
Legal Information#
Intel, the Intel logo, and Xeon are trademarks of Intel Corporation in the U.S. and/or other countries.
GStreamer is an open source framework licensed under LGPL. See GStreamer licensing. You are solely responsible for determining if your use of GStreamer requires any additional licenses. Intel is not responsible for obtaining any such licenses, nor liable for any licensing fees due, in connection with your use of GStreamer.
*Other names and brands may be claimed as the property of others.