Get Started Guide#
1. Overview#
1.1 Prerequisites#
Operating System: Ubuntu* 24.04.1 Desktop LTS (fresh installation) on target system
Platform
Intel® Celeron® Processor 7305E (1C+1R usecase)
Intel® Core™ Ultra 7 Processor 165H (4C+4R usecase)
Intel® OpenVINO™ Toolkit
Version Type: 2024.5
RADDet Dataset
https://github.com/ZhangAoCanada/RADDet#Dataset
Ensure that proxy settings are configured if target system is within proxy environment
export http_proxy=<Your-Proxy>
export https_proxy=<Your-Proxy>
Prepare python virtual environment
sudo apt-get install python3-venv
python3 -m venv venv
source venv/bin/activate
1.2 Modules#
AI Inference Service:
Media Processing (Camera)
Radar Processing (mmWave Radar)
Sensor Fusion
Demo Application
1.2.1 AI Inference Service#
AI Inference Service expose both RESTful API or gRPC API to clients, so as pipelines defined by clients could be requested to run within service.
vim $PROJ_DIR/ai_inference/source/low_latency_server/AiInference.config

...
[HTTP]
address=0.0.0.0
RESTfulPort=50051
gRPCPort=50052
RESTful API: listen on port 50051
gRPC API: listen on port 50052
NOTE:
For more details about API description, please refer to file to APIs Section
For how to run tests through RESTful API and gRPC API, please refer to section 4. Run Sensor Fusion Application
1.2.2 Demo Application#
The media processing and sensor fusion results will be displayed. Here’s an example for reference:

For more details about the display mode, please refer to section 4.3 Run Entry Program
2. Install the Package and Build the Project#
2.1 Install the Download#
Select download to download the Metro AI Suite Sensor Fusion for Traffic Management package.
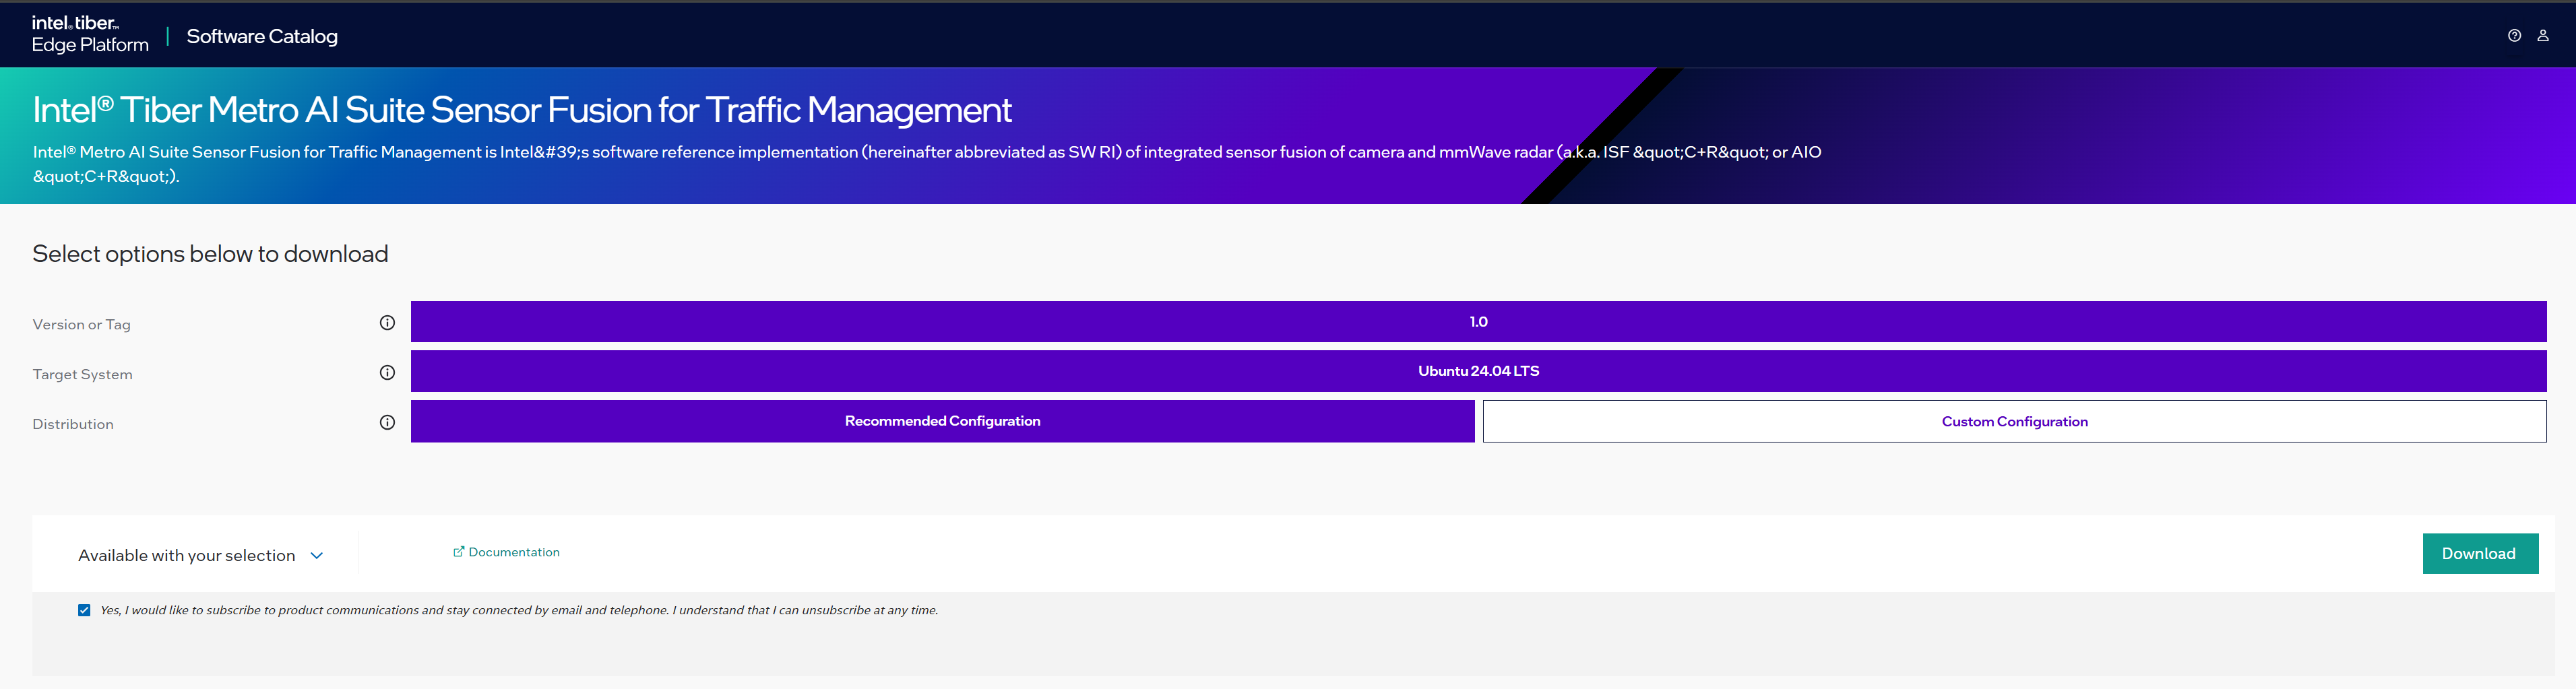
Figure 2. Download Page Click Download. In the next screen, accept the license agreement and copy the Product Key.
Transfer the downloaded package to the target Ubuntu* system and unzip:
unzip Metro-AI-Suite-Sensor-Fusion-for-Traffic-Management.zipNote: Please use the same credential that was created during Ubuntu installation to proceed with the installation for Intel® Metro AI Suite Sensor Fusion for Traffic Management.
Go to the
Metro-AI-Suite-Sensor-Fusion-for-Traffic-Management/directory:cd Metro-AI-Suite-Sensor-Fusion-for-Traffic-Management
Prepare python venv environment:
sudo apt-get install python3-venv
python3 -m venv venv
source venv/bin/activate
Change the permission of the executable
edgesoftwarefile:chmod 755 edgesoftware
Add GPU repository and install libva
 wget -qO - https://repositories.intel.com/gpu/intel-graphics.key | \
 sudo gpg --yes --dearmor --output /usr/share/keyrings/intel-graphics.gpg
 echo "deb [arch=amd64 signed-by=/usr/share/keyrings/intel-graphics.gpg] https://repositories.intel.com/gpu/ubuntu noble unified" | \
 sudo tee /etc/apt/sources.list.d/intel-gpu-noble.list

 sudo apt-get update
 sudo apt install libva-glx2=2.22.0.2-87~u24.04 libva-wayland2=2.22.0.2-87~u24.04 libva-x11-2=2.22.0.2-87~u24.04 libva2=2.22.0.2-87~u24.04 libva-drm2=2.22.0.2-87~u24.04
 sudo rm /usr/share/keyrings/intel-graphics.gpg /etc/apt/sources.list.d/intel-gpu-noble.list
Install the Metro AI Suite Sensor Fusion for Traffic Management package:
./edgesoftware installWhen prompted, enter the Product Key. You can enter the Product Key mentioned in the email from Intel confirming your download (or the Product Key you copied in Step 2).
Note for People’s Republic of China (PRC) Network:
If you are connecting from the PRC network, the following prompt will appear during
bmra baseinstallation:
Figure 3. Prompt to Enable PRC Network Mirror Type No to use the default settings, or Yes to enter the local mirror URL for pip and apt package managers.
When prompted for the Remote Device Management feature, type no

Figure 4. Prompt to Enable RDM When prompted for the BECOME password, enter your Linux* account password.

Figure 5. Prompt for BECOME Password When prompted to reboot the machine, press Enter. Ensure to save your work before rebooting.

Figure 6. Prompt to Reboot After rebooting, resume the installation:
cd Metro-AI-Suite-Sensor-Fusion-for-Traffic-Management
source venv/bin/activate
./edgesoftware install
When the installation is complete, you will see the message “Installation of package complete” and the installation status for each module.
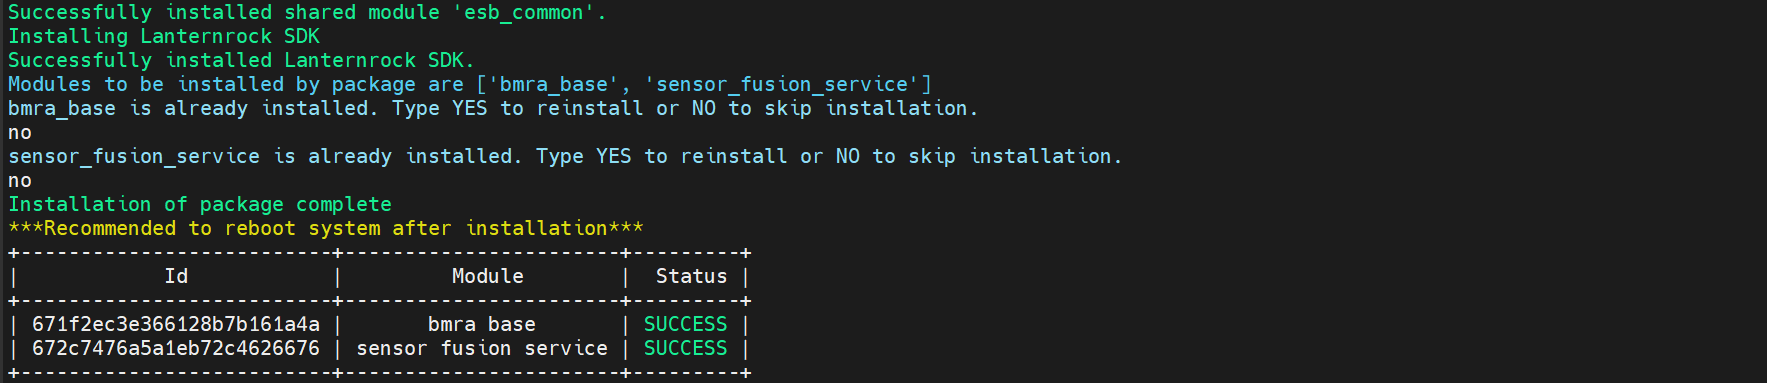
Figure 7. Installation Complete Message
2.2 Install Dependencies and Build Project#
Install 3rd party libs
cd Metro_AI_Suite_Sensor_Fusion_for_Traffic_Management_1.0/sensor_fusion_service
sudo apt-mark unhold $(apt-mark showhold)
bash install_3rd.sh
set $PROJ_DIR
cd Metro_AI_Suite_Sensor_Fusion_for_Traffic_Management_1.0/sensor_fusion_service
export PROJ_DIR=$PWD
prepare global radar configs in folder: /opt/datasets
sudo ln -s $PROJ_DIR/ai_inference/deployment/datasets /opt/datasets
prepare models in folder: /opt/models
sudo ln -s $PROJ_DIR/ai_inference/deployment/models /opt/models
prepare offline radar results for 4C4R:
sudo mv $PROJ_DIR/ai_inference/deployment/datasets/radarResults.csv /opt
build project
bash -x build.sh
3. Download and Convert Dataset#
For how to get RADDet dataset, please refer to this guide: how_to_get_RADDet_datasets.md
Upon success, bin files will be extracted, save to $RADDET_DATASET_ROOT/bin_files_{VERSION}:
NOTE: latest converted dataset version should be: v1.0
4. Run Sensor Fusion Application#
In this section, we describe how to run Metro AI Suite Sensor Fusion for Traffic Management application.
Metro AI Suite Sensor Fusion for Traffic Management application can support different pipeline using topology JSON files to describe the pipeline topology. The defined pipeline topology can be found at section 4.1 Resources Summary
There are two steps required for running the sensor fusion application:
Start AI Inference service, more details can be found at section 4.2 Start Service
Run the application entry program, more details can be found at section 4.3 Run Entry Program
Besides, users can test each component (without display) following the guides at section 4.4 Run Unit Tests
4.1 Resources Summary#
Local File Pipeline for Media pipeline
Json File: localMediaPipeline.json
File location:
$PROJ_DIR/ai_inference/test/configs/raddet/1C1R/localMediaPipeline.jsonPipeline Description:
input -> decode -> detection -> tracking -> output
Local File Pipeline for mmWave Radar pipeline
Json File: localRadarPipeline.json
File location:
$PROJ_DIR/ai_inference/test/configs/raddet/1C1R/localRadarPipeline.jsonPipeline Description:
input -> preprocess -> radar_detection -> clustering -> tracking -> output
Local File Pipeline for
Camera + Radar(1C+1R)Sensor fusion pipelineJson File: localFusionPipeline.json
File location:
$PROJ_DIR/ai_inference/test/configs/raddet/1C1R/localFusionPipeline.jsonPipeline Description:
input  | -> decode     -> detector         -> tracker                  -> |
       | -> preprocess -> radar_detection  -> clustering   -> tracking -> | -> coordinate_transform->fusion -> output
Local File Pipeline for
Camera + Radar(4C+4R)Sensor fusion pipelineJson File: localFusionPipeline.json
File location:
$PROJ_DIR/ai_inference/test/configs/raddet/4C4R/localFusionPipeline.jsonPipeline Description:
input  | -> decode     -> detector         -> tracker                  -> |
       |              -> radarOfflineResults ->                           | -> coordinate_transform->fusion -> |
input  | -> decode     -> detector         -> tracker                  -> |                                    |
       |              -> radarOfflineResults ->                           | -> coordinate_transform->fusion -> | -> output
input  | -> decode     -> detector         -> tracker                  -> |                                    |
       |              -> radarOfflineResults ->                           | -> coordinate_transform->fusion -> |
input  | -> decode     -> detector         -> tracker                  -> |                                    |
       |              -> radarOfflineResults ->                           | -> coordinate_transform->fusion -> |
4.2 Start Service#
Open a terminal, run the following commands:
cd $PROJ_DIR
sudo bash -x run_service_bare.sh

# Output logs:
    [2023-06-26 14:34:42.970] [DualSinks] [info] MaxConcurrentWorkload sets to 1
    [2023-06-26 14:34:42.970] [DualSinks] [info] MaxPipelineLifeTime sets to 300s
    [2023-06-26 14:34:42.970] [DualSinks] [info] Pipeline Manager pool size sets to 1
    [2023-06-26 14:34:42.970] [DualSinks] [trace] [HTTP]: uv loop inited
    [2023-06-26 14:34:42.970] [DualSinks] [trace] [HTTP]: Init completed
    [2023-06-26 14:34:42.971] [DualSinks] [trace] [HTTP]: http server at 0.0.0.0:50051
    [2023-06-26 14:34:42.971] [DualSinks] [trace] [HTTP]: running starts
    [2023-06-26 14:34:42.971] [DualSinks] [info] Server set to listen on 0.0.0.0:50052
    [2023-06-26 14:34:42.972] [DualSinks] [info] Server starts 1 listener. Listening starts
    [2023-06-26 14:34:42.972] [DualSinks] [trace] Connection handle with uid 0 created
    [2023-06-26 14:34:42.972] [DualSinks] [trace] Add connection with uid 0 into the conn pool
NOTE-1 : workload (default as 1) can be configured in file:
$PROJ_DIR/ai_inference/source/low_latency_server/AiInference.config
...
[Pipeline]
maxConcurrentWorkload=1
NOTE-2 : to stop service, run the following commands:
sudo pkill Hce
4.3 Run Entry Program#
4.3.1 1C+1R#
All executable files are located at: $PROJ_DIR/build/bin
Usage:
Usage: CRSensorFusionDisplay <host> <port> <json_file> <total_stream_num> <repeats> <data_path> <display_type> [<save_flag: 0 | 1>] [<pipeline_repeats>] [<fps_window: unsigned>] [<cross_stream_num>] [<warmup_flag: 0 | 1>]  [<logo_flag: 0 | 1>]
--------------------------------------------------------------------------------
Environment requirement:
   unset http_proxy;unset https_proxy;unset HTTP_PROXY;unset HTTPS_PROXY
host: use
127.0.0.1to call from localhost.port: configured as
50052, can be changed by modifying file:$PROJ_DIR/ai_inference/source/low_latency_server/AiInference.configbefore starting the service.json_file: AI pipeline topology file.
total_stream_num: to control the input streams.
repeats: to run tests multiple times, so that we can get more accurate performance.
data_path: multi-sensor binary files folder for input.
display_type: support for
media,radar,media_radar,media_fusioncurrently.media: only show image results in front view. Example: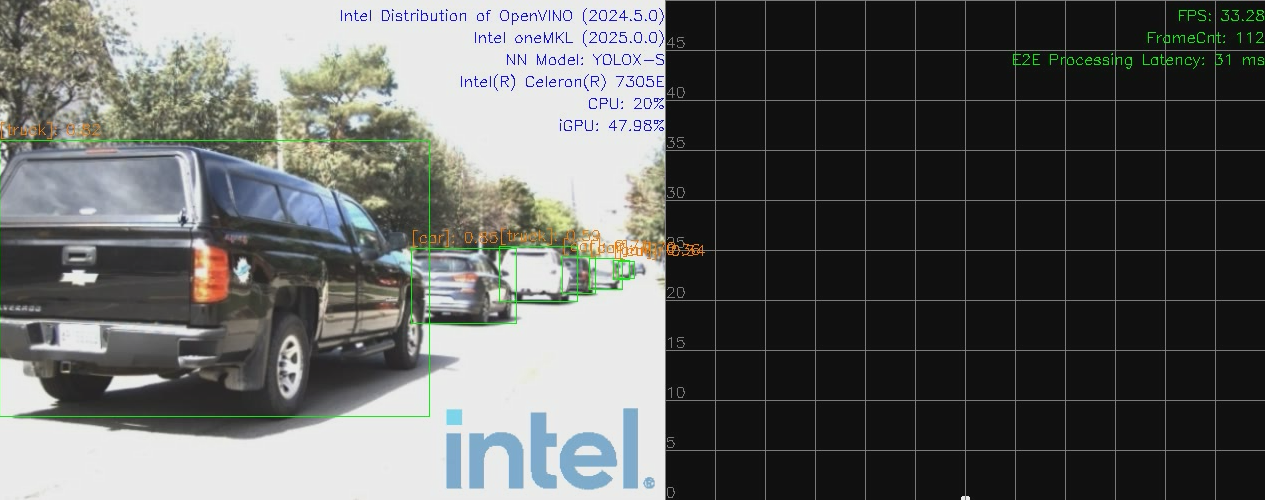
radar: only show radar results in birdview. Example:
media_radar: show image results in front view and radar results in birdview separately. Example: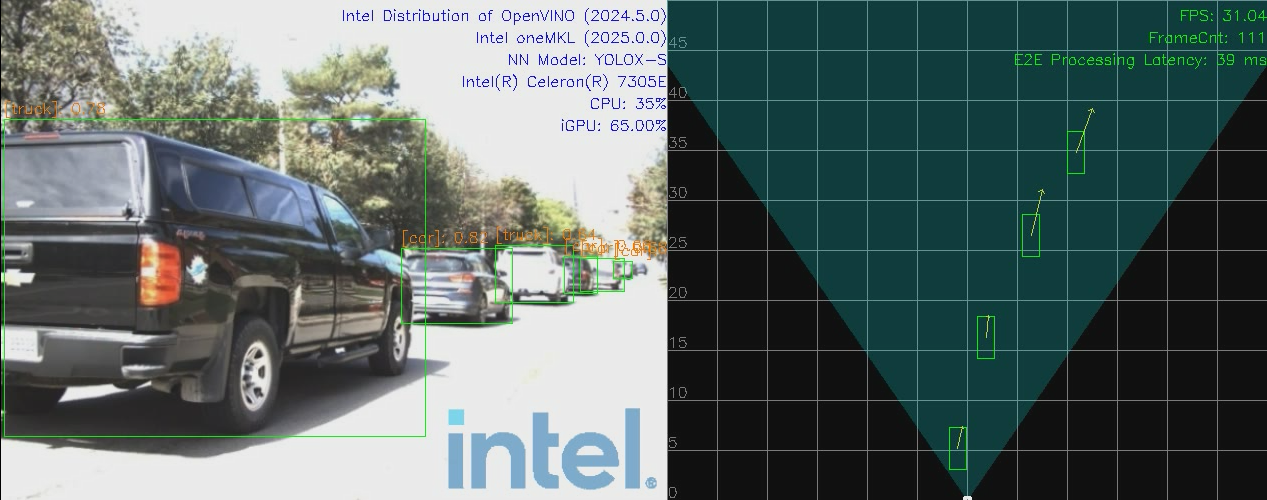
media_fusion: show both for image results in front view and fusion results in birdview. Example:
save_flag: whether to save display results into video.
pipeline_repeats: pipeline repeats number.
fps_window: The number of frames processed in the past is used to calculate the fps. 0 means all frames processed are used to calculate the fps.
cross_stream_num: the stream number that run in a single pipeline.
warmup_flag: warmup flag before pipeline start.
logo_flag: whether to add intel logo in display.
More specifically, open another terminal, run the following commands:
# multi-sensor inputs test-case
sudo -E ./build/bin/CRSensorFusionDisplay 127.0.0.1 50052 ai_inference/test/configs/raddet/1C1R/libradar/localFusionPipeline_libradar.json 1 1 /path-to-dataset media_fusion
Note: Run with
rootif users want to get the GPU utilization profiling.
4.3.3 4C+4R#
All executable files are located at: $PROJ_DIR/build/bin
Usage:
Usage: CRSensorFusion4C4RDisplay <host> <port> <json_file> <additional_json_file> <total_stream_num> <repeats> <data_path> <display_type> [<save_flag: 0 | 1>] [<pipeline_repeats>] [<cross_stream_num>] [<warmup_flag: 0 | 1>] [<logo_flag: 0 | 1>]
--------------------------------------------------------------------------------
Environment requirement:
   unset http_proxy;unset https_proxy;unset HTTP_PROXY;unset HTTPS_PROXY
host: use
127.0.0.1to call from localhost.port: configured as
50052, can be changed by modifying file:$PROJ_DIR/ai_inference/source/low_latency_server/AiInference.configbefore starting the service.json_file: AI pipeline topology file.
additional_json_file: AI pipeline additional topology file.
total_stream_num: to control the input streams.
repeats: to run tests multiple times, so that we can get more accurate performance.
data_path: multi-sensor binary files folder for input.
display_type: support for
media,radar,media_radar,media_fusioncurrently.media: only show image results in front view. Example: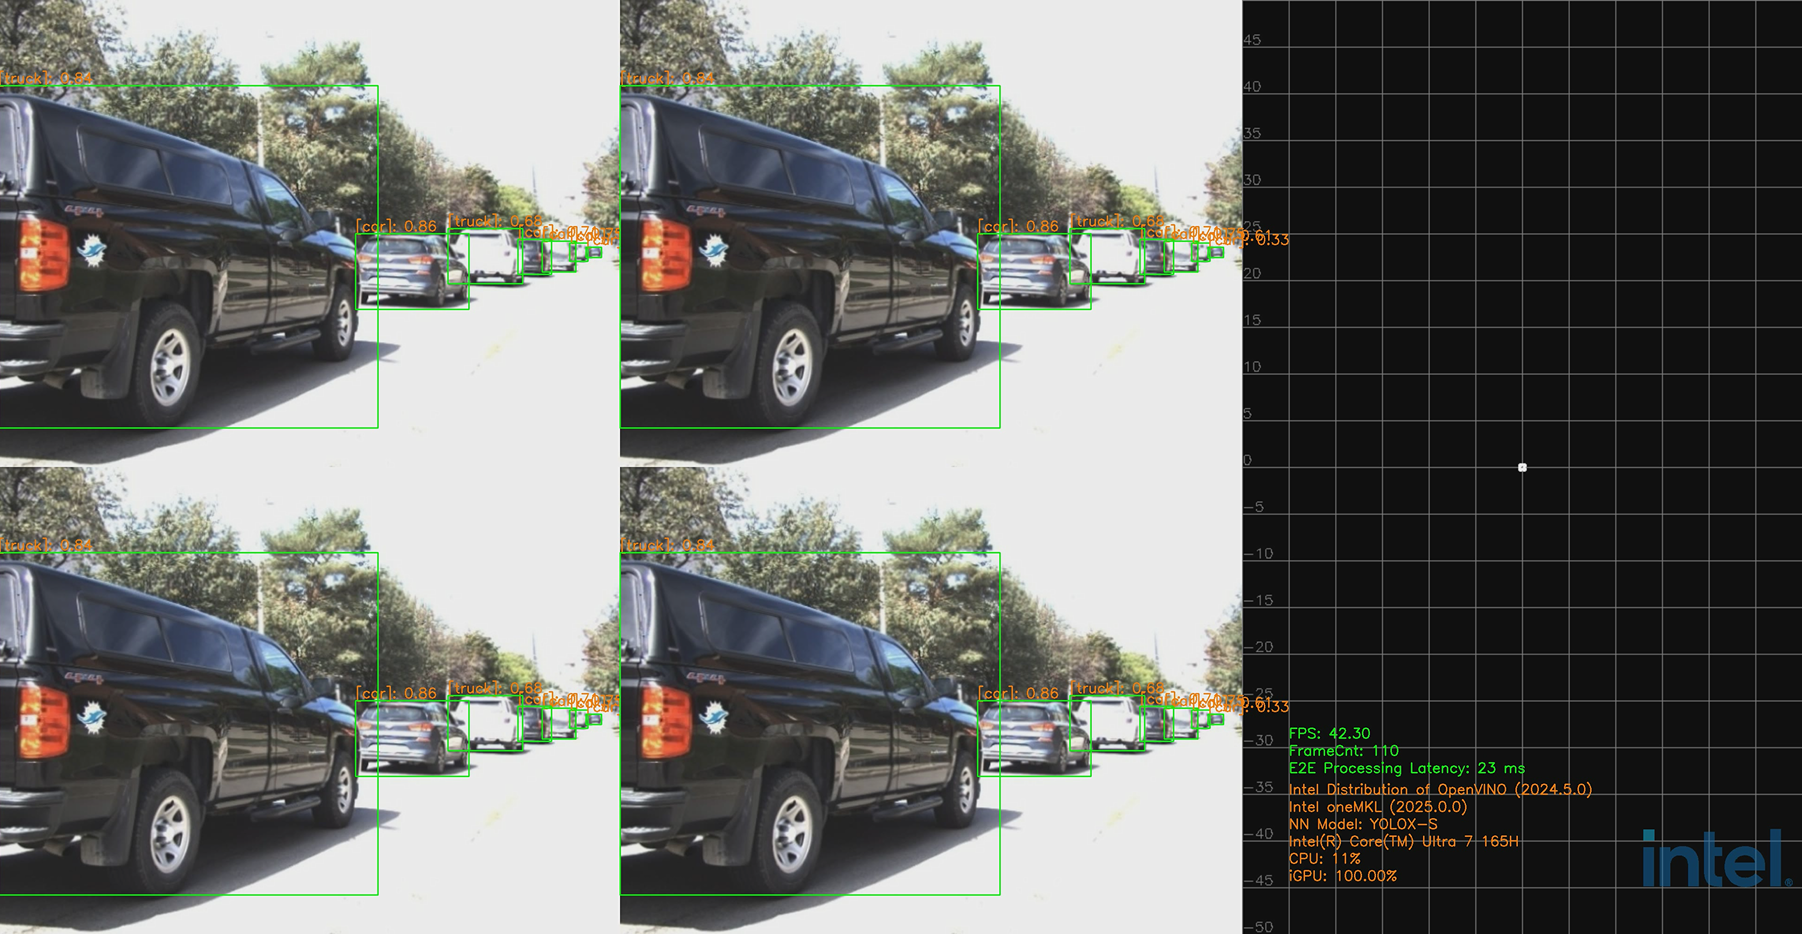
radar: only show radar results in bird view. Example: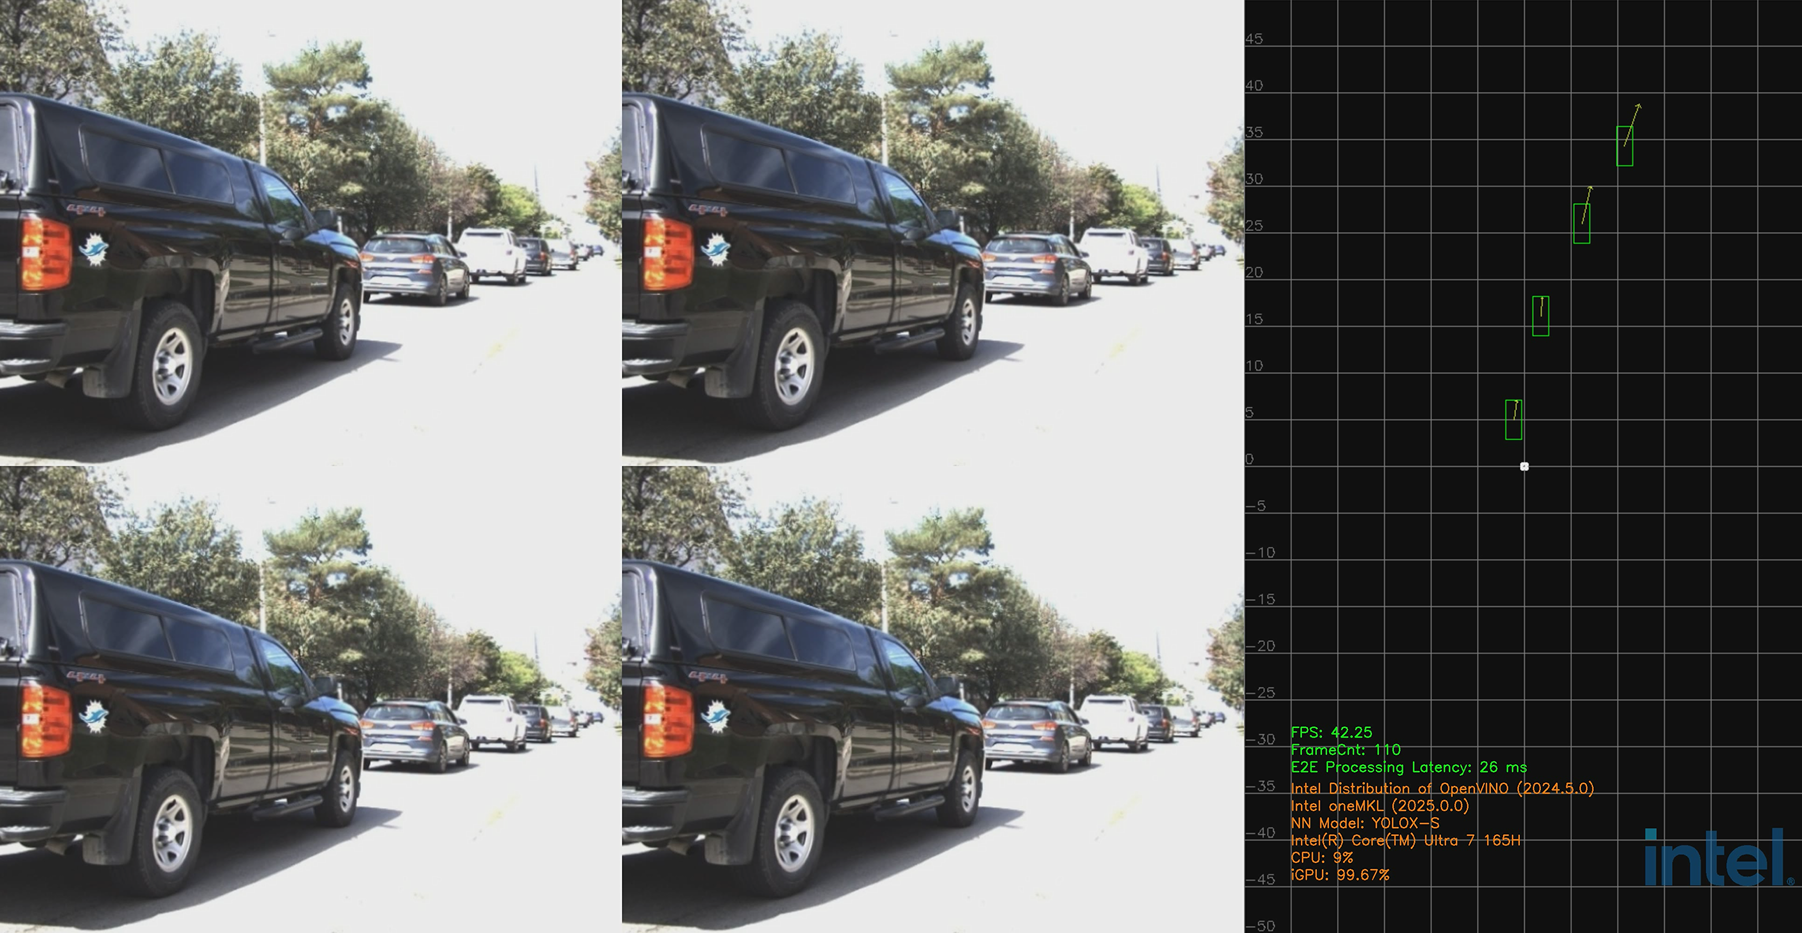
media_radar: show image results in front view and radar results in bird view separately. Example: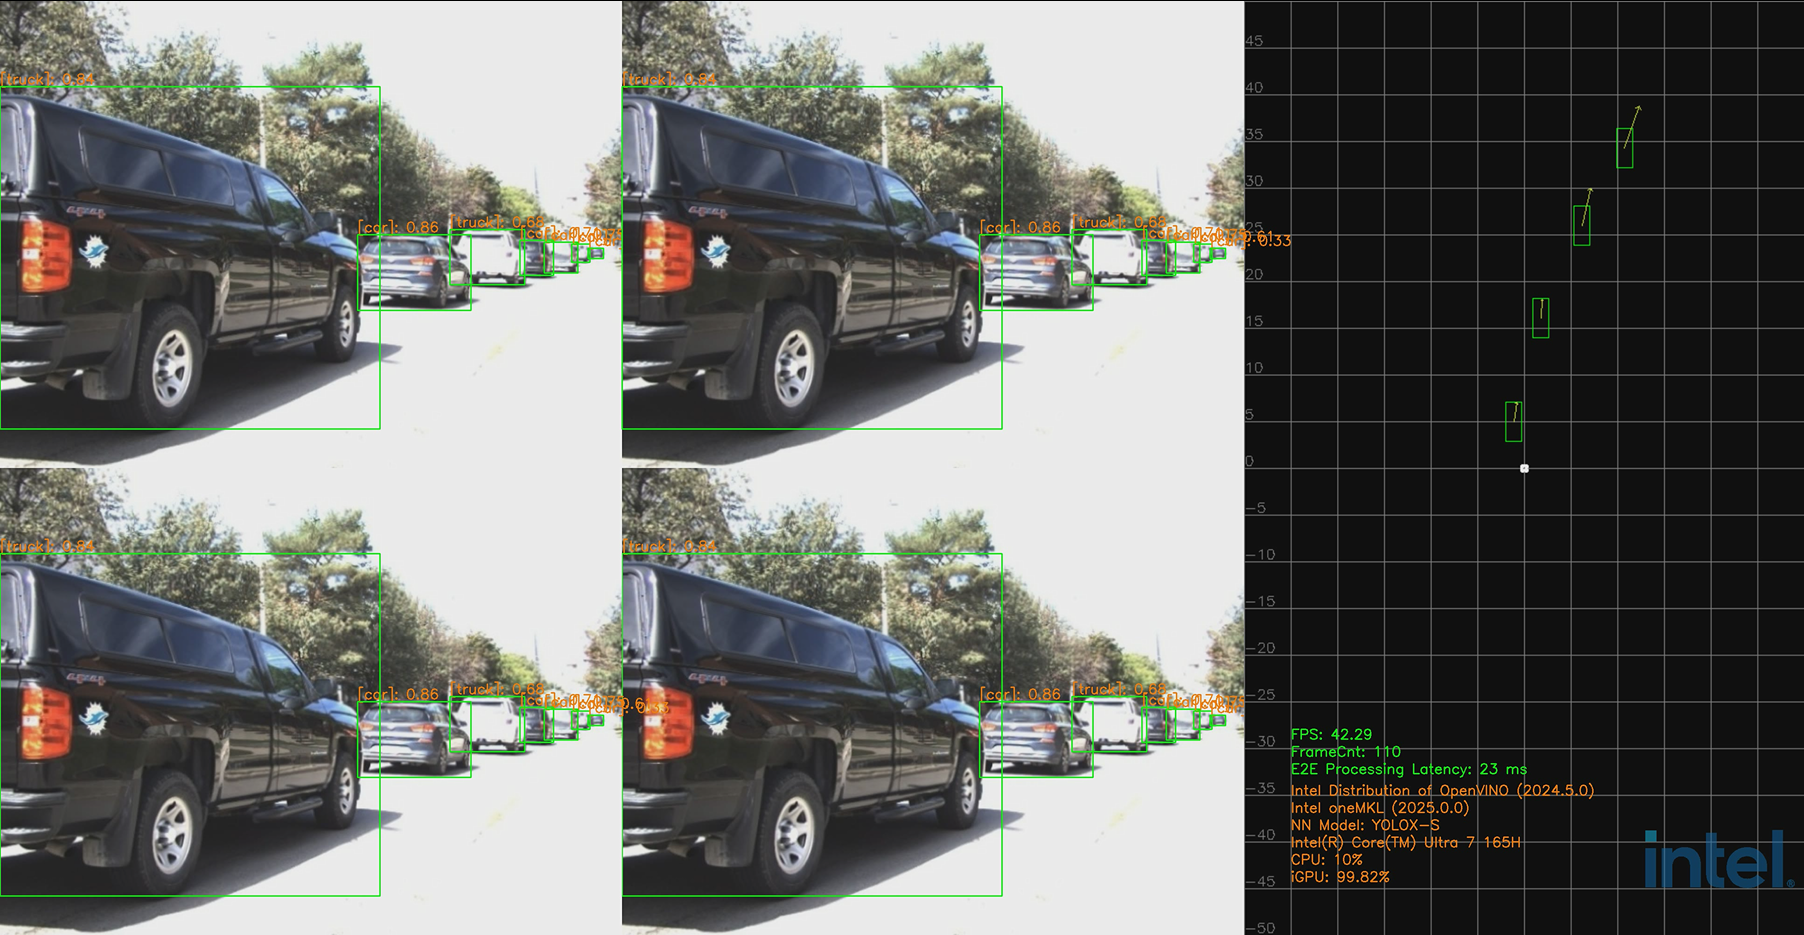
media_fusion: show both for image results in front view and fusion results in bird view. Example: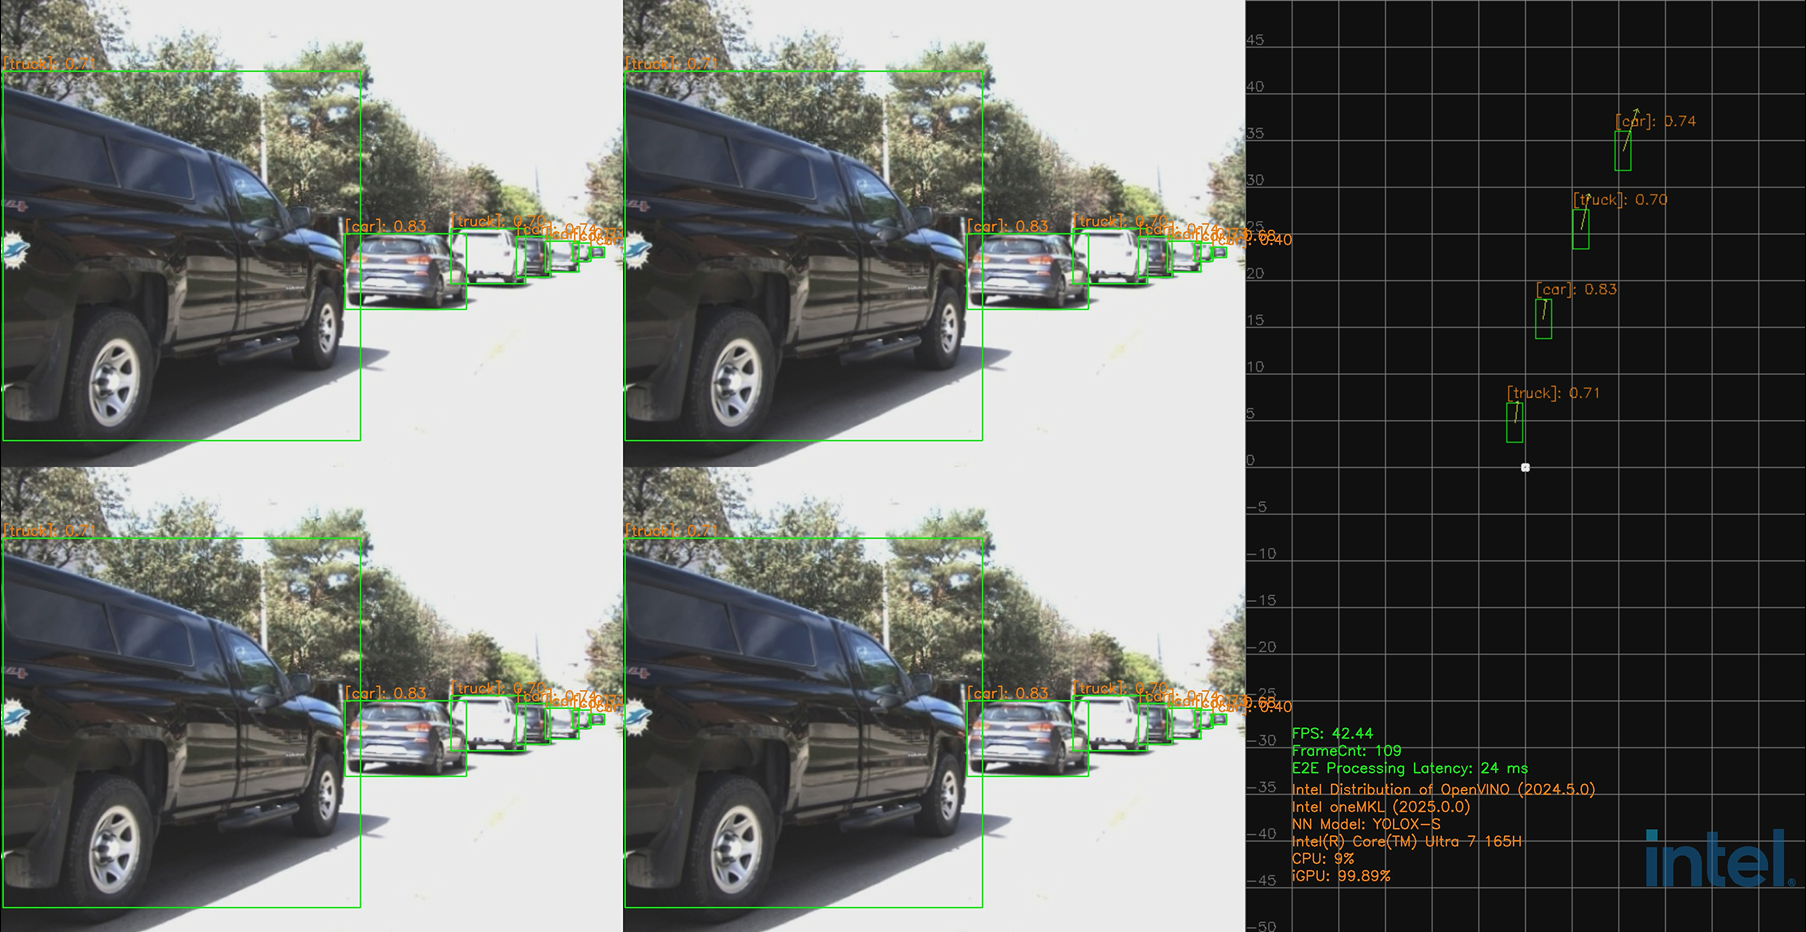
save_flag: whether to save display results into video.
pipeline_repeats: pipeline repeats number.
cross_stream_num: the stream number that run in a single pipeline.
warmup_flag: warm up flag before pipeline start.
logo_flag: whether to add intel logo in display.
More specifically, open another terminal, run the following commands:
# multi-sensor inputs test-case
sudo -E ./build/bin/CRSensorFusion4C4RDisplay 127.0.0.1 50052 ai_inference/test/configs/raddet/4C4R/localFusionPipeline.json ai_inference/test/configs/raddet/4C4R/localFusionPipeline_npu.json 4 1 /path-to-dataset media_fusion
Note: Run with
rootif users want to get the GPU utilization profiling.
5. Code Reference#
Some of the code is referenced from the following projects:
IGT GPU Tools (MIT License)
Intel DL Streamer (MIT License)
Open Model Zoo (Apache-2.0 License)
Troubleshooting#
If your network quality is poor, you may encounter the following error:

Figure 8: grpc Git Clone Error This error message indicates that there was an issue communicating with the remote repository while using Git, specifically
RPC failed; curl 92 HTTP/2 stream was not closed cleanly: CANCEL (err 8)is usually related to network problems or Git configuration issues.To solve this issue, you can set the configurations below and try to run install_3rd.sh again.
git config --global http.postBuffer 524288000
git config --global http.version HTTP/1.1
If your machine environment is not Ubuntu* OS fresh installed, you may encounter the following error:
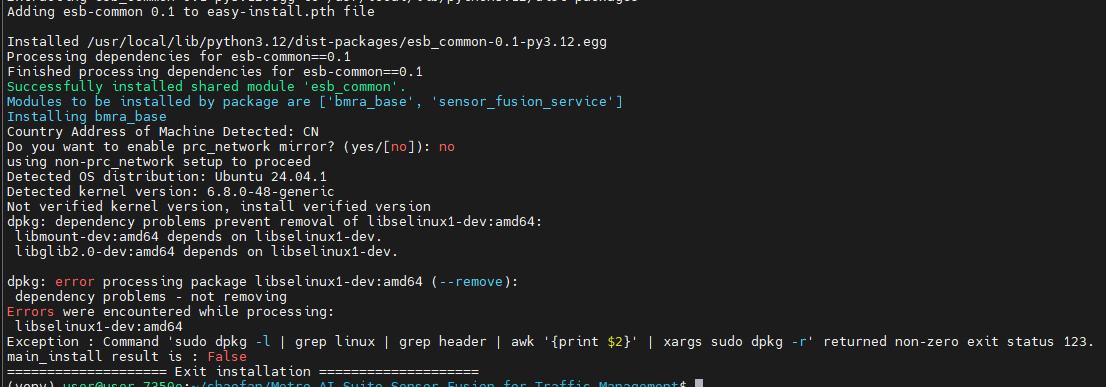
Figure 9: NEPRA installation error There are environment conflicts when installing NEPRA base platform. To solve this problem, you need to perform a fresh installation of Ubuntu* 24.04.1 Desktop LTS on the target system.
If your system time is not correct, you may encounter the following error:

Figure 10: Edgesoftware Installation Error To solve this problem, you need to set the right system time.
If you run different pipelines in a short period of time, you may encounter the following error:

Figure 11: Workload constraints error This is because the maxConcurrentWorkload limitation in
AiInference.configfile. If the workloads hit the maximum, task will be canceled due to workload constrains. To solve this problem, you can kill the service with the commands below, and re-execute the command.sudo pkill Hce
If you encounter the following error during code compilation, it is because mkl is not installed successfully:
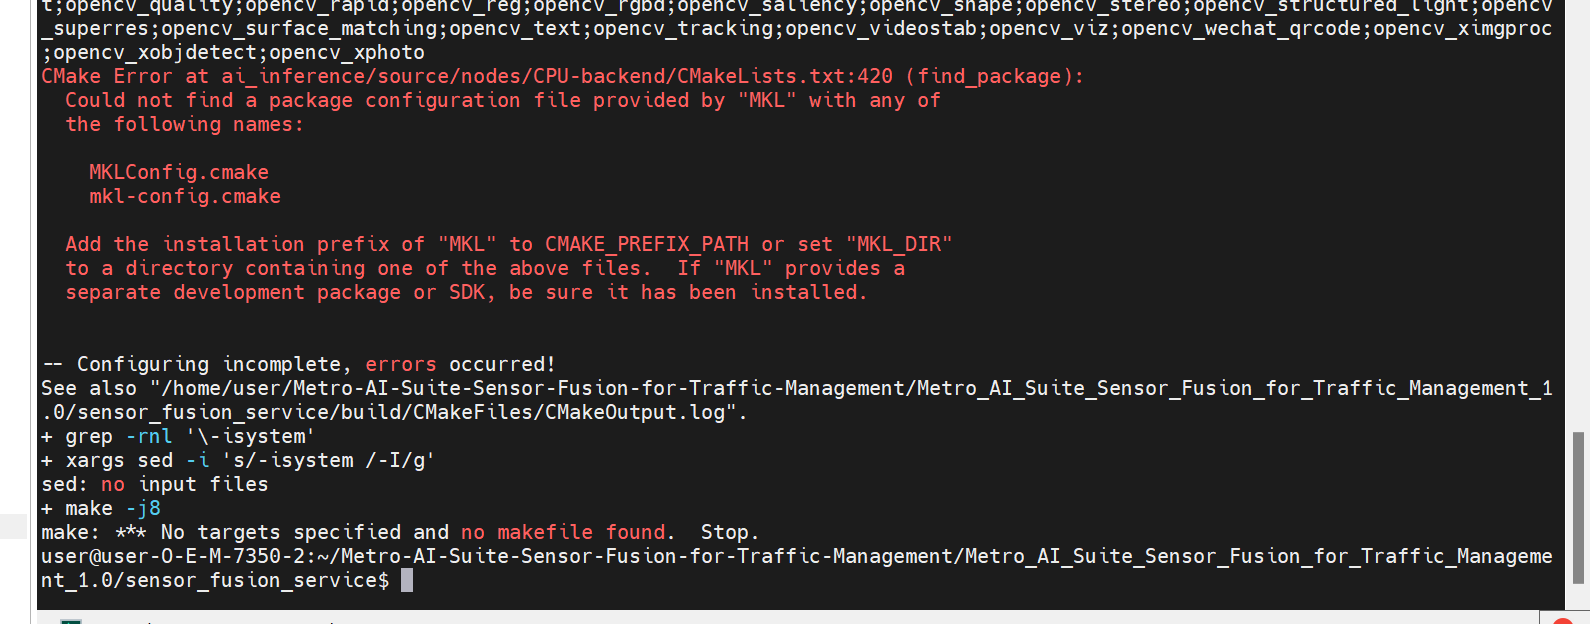
Figure 12: Build failed due to mkl error Run
ls /opt/intelto check if there is a OneAPI directory in the output. If not, it means that mkl was not installed successfully. You need to reinstall mkl by following the steps below:curl -k -o GPG-PUB-KEY-INTEL-SW-PRODUCTS.PUB https://apt.repos.intel.com/intel-gpg-keys/GPG-PUB-KEY-INTEL-SW-PRODUCTS.PUB -L sudo -E apt-key add GPG-PUB-KEY-INTEL-SW-PRODUCTS.PUB && sudo rm GPG-PUB-KEY-INTEL-SW-PRODUCTS.PUB echo "deb https://apt.repos.intel.com/oneapi all main" | sudo tee /etc/apt/sources.list.d/oneAPI.list sudo -E apt-get update -y sudo -E apt-get install -y intel-oneapi-mkl-devel lsb-release
If the system time is incorrect, you may encounter the following errors during installation:
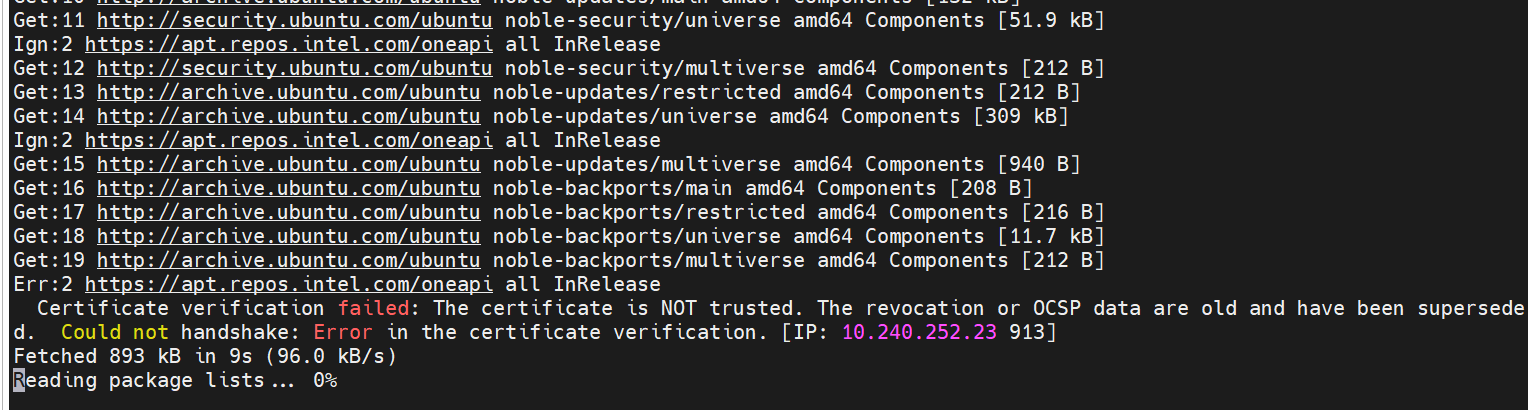
Figure 13: System Time Error You need to set the correct system time, for example:
sudo timedatectl set-ntp true
Then re-run the above installation command.
sudo apt-get remove --purge intel-oneapi-mkl-devel
sudo apt-get autoremove -y
sudo apt-get install -y intel-oneapi-mkl-devel
Release Notes#
Current Version: 1.0
Enhanced radar signal processing pipeline and added radar library.
Supported multiple CFAR algorithms including CACFAR and OSCFAR.
Supported multiple AoA estimation algorithms including FFT, DBF, CAPON and MUSIC.
Enhanced media processing pipeline with input control.
Added accuracy benchmark test for deep learning model and radar detection results.
Added cross-stream batching support for 4C+4R pipeline.
Added profiling tools for modular latency analysis.
Added ESC package support.
Updated OpenVINO to 2024.5.
Updated oneMKL to 2025.0.0.