Get Started#
Intel® ESQ CLI tool and test modules are installed as part of the Edge Software package selected above.
Note: Be aware that screenshots may show a package version number that is different from the current release. See the Release Notes for information on the current release.
Time to Complete: Approximately 45 minutes for installation and 30 minutes for execution depending on the test modules
Programming Language: Python 3.12
Test Modules: Depend on the Test Modules
Target System Requirements#
At least 2 GB RAM.
At least 32 GB hard drive.
A stable Internet connection.
Supported Operating Systems:
Ubuntu 24.04 LTS
Ubuntu 22.04 LTS
Step 1: Download and Install Intel® ESQ#
Select Configure & Download on one of the pages below to download the package:
After you have successfully downloaded the Intel ESQ package, create an installation path, copy the package into the target system and extract the package.
Navigate to the extracted package,
edge_system_qualificationand changeedgesoftwareto an executable permission.cd edge_system_qualification chmod +x edgesoftware
Run the command below to install the Intel® ESQ and test modules on the target system.
sudo apt install python3-venv
python3 -m venv venv
./edgesoftware install
During installation process, you will be prompted to enter the Product Key you received during the package download. When the installation is complete, you see the message
Installation of package completeand the installation status for each module.Note: Make sure all the modules installed successfully before you start using the Intel® ESQ. If any module failed to install, run the command:
./edgesoftware update <Failed Module ID(s)>
Once the installation is completed, reboot the system.
The Intel® ESQ CLI and the test modules are already available in the target system. To go to the directory for the Intel® ESQ, edit the change directory command below before running it:
cd ~/esq
Step 2: Running the Application#
Download and install Intel® ESQ with the respective test module to continue in this section. To run Intel® ESQ as a complete test suite via
esqCLI. Change directory to the location of Intel® ESQ folder using the command:cd ~/esq
Check the Intel® ESQ version using the command:
esq --versionExample output
Version: 11.2.1
Run
esq --helpto view the available command-line options foresq:esq --helpExample output
Usage: esq [OPTIONS] COMMAND [ARGS]...

Edge System Qualification

Options:
--version          Show package version
--verbose          Show command verbose output
--help             Show this message and exit.

Commands:
config    Manage configs
log       Manage logs
module    Manage modules
run       Run specified modules, or all modules if none are specified.
Run
esq module listto list the available test modules.esq module list
Example output
Listing all modules:
ai-edge-system
system
Note:
Systemtest module is a pre-distributed test module in the Intel ESQ.Run Intel® ESQ test execution. This command runs the test modules, which are listed in the package.
Note: Use
--verboseoption to show verbose output.esq runExample output
No specific modules provided, running all modules
Running module 1/1: system
Executing module with command: ./run.sh
Verifying the result
Starting report generation
Report successfully created at: /home/user/reports/
Execution completed
Note: If the CLI asks for super user permission, please provide the sudo password when prompted. This command will execute the installed test module and generate a report once execution is completed.
Once test execution of the test module completed, the report will be generated in the location as stated in the CLI. Navigate to the
reportsfolder. Extract the zip file to view thehtmlreportcd reports
Example content
.
├── report_2025-05-13_10-35-40.html
└── report.zip
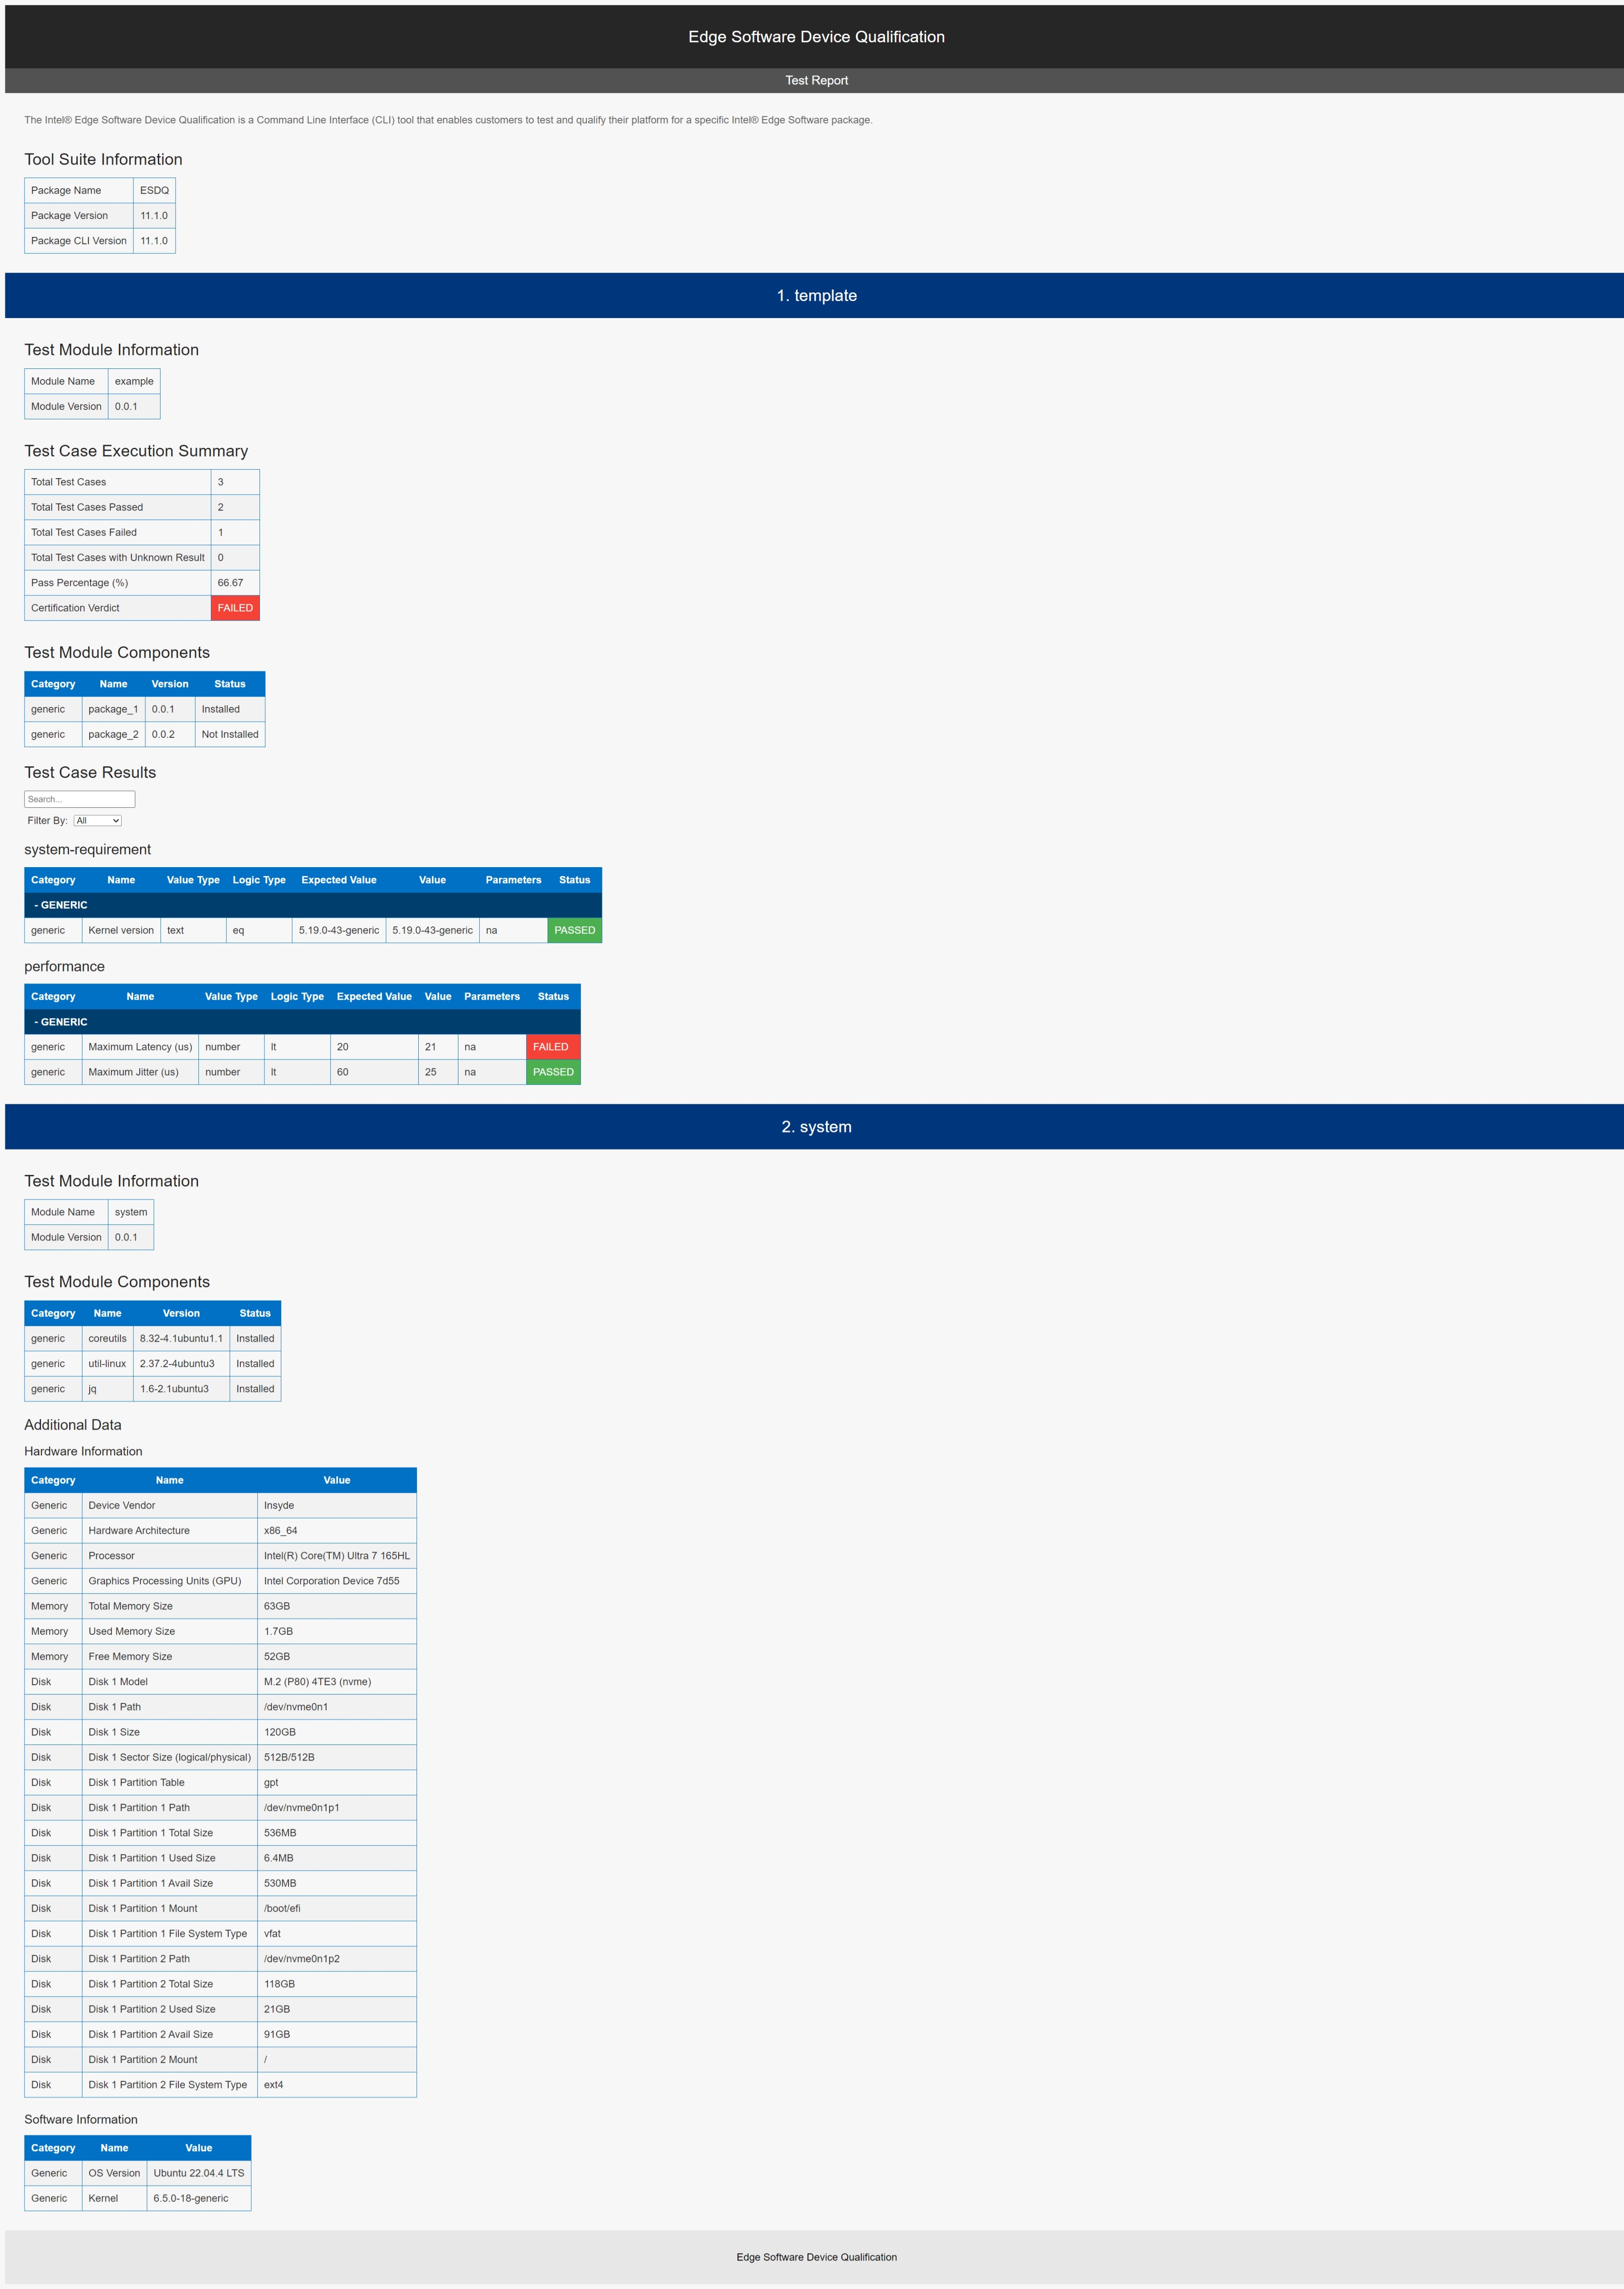
Open your preferred web browser to view
report.htmlin your computer and send it edgesoftwaredevicequalification@intel.com to continue the devkit qualification process.
Summary and Next Steps#
With the Intel® ESQ CLI tool, you were able to run an Intel provided test suite at the target system, with the goal of testing your platform for a specific Edge Software package. Intel® ESQ generated a complete test report in HTML format, along with detailed logs packaged as one zip file.
As a next step, you can submit the final result package (Example: report.zip and report.html) by email to the edge.software.device.qualification@intel.com.
Learn More#
Troubleshooting#
Debian 10 Python Environment Issue#
You may encounter the RuntimeError below when executing esq or edgesoftware CLI.

Solution
Execute the exports below before CLI usage:
export LC_ALL=C.UTF-8
export LANG=C.UTF-8
Support Forum#
If you’re unable to resolve your issues, contact the Support Forum.