How To Manage Pipeline#
This section describes how to create custom AI pipelines for the sample application and the commands to manage these pipelines.
Create Pipelines#
The AI pipelines are defined by the config.json file present at the root of the repository (for docker compose deployment) and present inside the helm directory (for helm based deployment. Please also note that the port in the cURL/REST requests needs to be changed from 8080 to 31107 for helm based deployment).
The following is an example of the weld porosity classification pipeline, which is included in the config.json file.
     "pipelines": [
        {
            "name": "weld_porosity_classification",
            "source": "gstreamer",
            "queue_maxsize": 50,
            "pipeline": "{auto_source} name=source ! decodebin ! videoconvert ! gvaclassify inference-region=full-frame name=classification ! queue ! gvawatermark ! gvafpscounter ! gvametaconvert add-empty-results=true name=metaconvert ! appsink name=destination",
            "parameters": {
                "type": "object",
                "properties": {
                    "classification-properties": {
                         "element": {
                            "name": "classification",
                            "format": "element-properties"
                          }
                    }
                }
            },
            "auto_start": false
        },
Customize the pipeline according to your needs. For details, see the following DL Streamer Pipeline Server documentation:
Start the Pipeline#
Follow this procedure to start the pipeline.
In the config.json file, identify the name of the pipeline you want to start.
The name of the pipeline is defined by the name parameter.
 "pipelines": [
     {
           "name": "pipeline_name",
           "source": "....",
           "pipeline": "...."
           "..."
     }
  ]
You use a Client URL (cURL) command to start the pipeline.
In this example, a pipeline included in this sample application is weld_porosity_classification. Start this pipeline with the following cURL command.
     curl http://<HOST_IP>:31107/pipelines/user_defined_pipelines/weld_porosity_classification -X POST -H 'Content-Type: application/json' -d '{
         "source": {
             "uri": "file:///home/pipeline-server/resources/videos/welding.avi",
             "type": "uri"
         },
         "parameters": {
             "classification-properties": {
                 "model": "/home/pipeline-server/resources/models/geti/weld_porosity_classification/deployment/Classification/model/model.xml",
                 "device": "CPU"
             }
         }
     }'
Take note of the instance ID (without quotes).
Each pipeline has its instance ID. You will need the instance ID to stop the pipeline later.
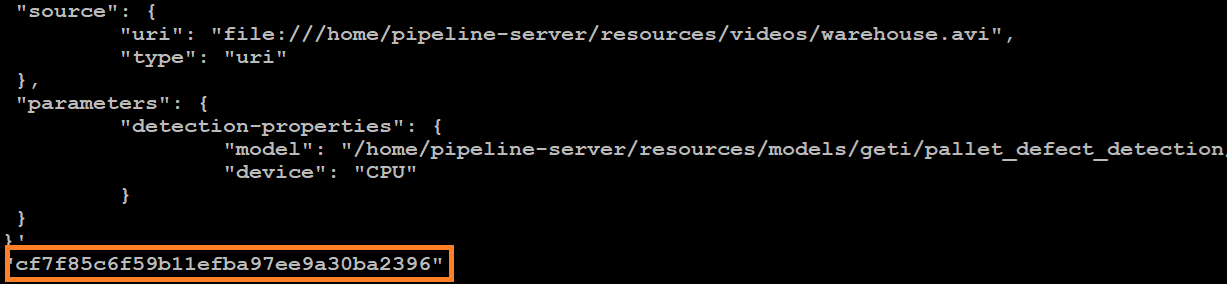
Figure 1: Example of a pipeline instance ID
Get Statistics of the Running Pipelines#
Request the pipeline statistics with this cURL command.
Replace HOST_IP with the IP address of your system.
curl --location -X GET http://<HOST_IP>:31107/pipelines/status
Stop the Pipeline#
Stop the pipeline with the following cURL command.
Replace HOST_IP with the IP address of your system and instance_id with the instance ID (without quotes) of the running pipeline.
curl --location -X DELETE http://<HOST_IP>:31107/pipelines/{instance_id}
Note The instance ID is shown in the Terminal when the pipeline was started or when pipeline statistics were requested.